Daz 3D Studio
Meet Daz 3D: Daz 3D Studio is a sophisticated software for PC and Mac that makes it easy and fast to create 3D content. Specifically 3D scenes with content ranging from a mysterious exotic island to a castle dungeon. And not just standalone scenes: the program also supports animations, thanks to both camera movement and automated character movement. But its greatest strength is that it comes with an extensive library of 3D objects and scenes that you can customize to your liking.
While a good graphics card, preferably from nVidia, is recommended for working with Daz 3D, in practice a computer that relies only on graphics integrated directly into the processor is also usable. But you'll appreciate it if your computer has enough memory available, especially for larger scenes.
Starting to create
Daz 3D Studio can be downloaded separately or via the manufacturer's Install Manager. The second option is a bit more time consuming, but then again you can also manage your library of 3D objects (both free ones and ones you may purchase in the future) through the Install Manager, so we recommend this approach. The software can be found on the Daz 3D website and is free. You just need to create an online user account, which will also store your Daz 3D content.
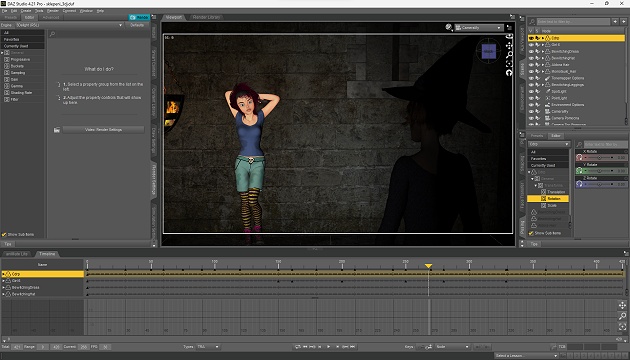
Once you've installed Daz 3D, launch it and you can start playing with objects right away. On the left-hand side, you'll notice a window with a Content Library tab, which is where you'll find the 3D content that the manufacturer has provided you with for free at this point. It varies from version to version of the program, but it's typically basic characters with selected clothing, a few different 3D objects, and one complete scene. Any of these can be easily placed on the scene in the window at the top center. Just double-click on the selected one.
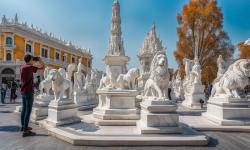
There are lots of free 3D objects available.
You can arrange 3D models on the scene with your mouse the way you want, set up lights, position cameras. However, if you started by placing the whole scene, it probably already includes lights and cameras, so you don't need to worry about them now. After all, even if you only place one object in the scene, the program already offers several standard cameras and lights the scene, so getting started is always easy.
Although the interface of the program is very clear, if you haven't worked with a similar program before, we recommend you check out tutorials for Daz 3D on YouTube. There's a lot of them and they make it easy to learn whatever you need. Including animations.
How to create a 3D image, or Stereoscopy in action
Once you are satisfied with the scene, use the Render button to create the resulting image. But before you press the button, you can, again on the top left, set the image parameters - especially the resolution, for starters. Depending on the complexity of the scene and the performance of your computer, you may have to wait a shorter or longer time for the result. Save the image and you have the basis for your first 3D/stereoscopic image.
Let's say that the first image was taken as if you were looking at the scene with your left eye, now let's take a second image for your right eye. So let's move the camera a little to the right (which in practice means you'll probably move the whole scene to the left with the mouse and the appropriate button). And render again with the Render button.
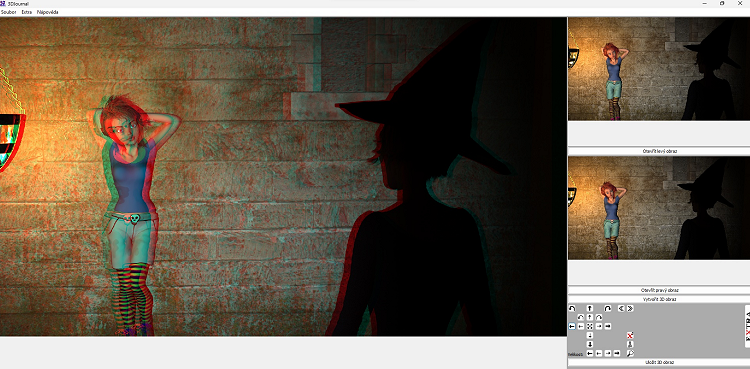
Composite 3D image from two images generated in Daz 3D
The well-known rule of thirty applies to camera panning. You should move it 1/30 of the distance of the closest object in the scene from you. For example, if there is a character in the scene 210 centimeters away from the camera, you would move the camera 210/30=7, or 7 centimeters. Does that sound complicated? For starters, you can try moving the camera randomly and create several images for different distances. You'll soon get the hang of it.
So once you have an image for both the left and right eye, use our 3DJournal program (downloadable from the link at the top of the page) to put them together. You can still play around a bit with the right and left shifts in it so that the 3D effect looks just the way you want it. And, of course, save the resulting stereoscopic image.
Gallery of rendered stereoscopic images
To get you started and to inspire you, we have prepared a small gallery of stereoscopic 3D images from Daz 3D created using the above procedure. To create the 3D scenes, we used footage from the Reformatory for Witches / The Island of Wizards video, which you can see on YouTube here. It was originally created as a regular 2D video from 3D models, however for the gallery we created both left and right eye 3D shots in Daz for selected scenes to create stereoscopic images. You can find the gallery of 3D images from Daz 3D here.
3DJournal, January 2024