This article was originally published in 2003, when both digital and film cameras were still living side by side. Twenty years later, the situation is different and most of us shoot with either a digital camera or a mobile phone. Still, you might like to read how cheap the trick was back then, in 2003.
One camera or two?
If you're using a single camera for stereo photography - or 3D photography, if you prefer - and you're panning it between left- and right-eye shots, you can never properly capture people or things that move faster than you can pan the camera. For moving subjects, you simply need to use a method where the left and right images are taken simultaneously.
This can be done not only by getting an expensive stereo camera, but also by buying two ordinary cameras and combining them. And you can, of course, start with disposable cameras on a trial basis. The cheapest ones cost less than 100 CZK (approx. 3 USD). (At the time of writing, even cheap digital cameras were too expensive - but today it is worth considering buying them.)
Making a 3D camera
Once you have two disposable cameras, you can choose two methods to make them into a 3D camera. Either you simply stick them side by side, or you place them on a common carrier that allows you to adjust the distance between them as needed.
If you opt for the second option, we can recommend a regular plastic wiring strip, which can be bought in DIY stores. The strip consists of a top and a bottom part that can be slid one after the other.
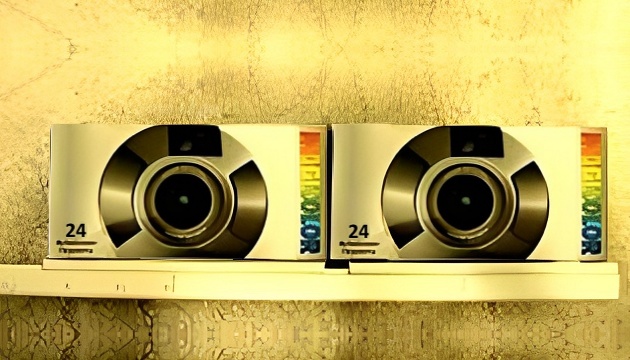
Two disposable cameras and a plastic rail will also serve as a 3D camera.
We recommend separating the two parts, cutting the bottom, thicker part to 60 centimeters and cutting two pieces as wide as your disposable cameras from the top. Now glue the cameras to the top part of the bar (we used Pattex Repair Express, but many cheaper adhesives will certainly do) and then attach them to the bottom part. The result should be the stereo camera you see in the opening photo.
Making photos
Whether you have the cameras glued together or on a rail, you now need to measure the distance of their lenses (if they are on a rail, bring them together for this measurement). The distance will probably be more than the recommended 6.5 centimeters, but that's okay. You just need to take this into account when taking 3D pictures - the longer the distance between the lenses of the left and right cameras, the further away the nearest subject in the picture needs to be from you.
In another 3DJournal article, you can read that for a lens distance of 6.5 centimeters, the closest object in the scene can be 2 meters away, if the distance is, for example, 10 centimeters, then it's 3 meters, and for 13 centimeters it's 4 meters. If you have the cameras on a rail, it is advisable to space them apart so that the distance between the lenses is one thirtieth the distance of the nearest subject (but you cannot, of course, space them further apart than the length of the rail).

Original 3D photographs composed of two paper photographs taken by disposable cameras. Photo: 3DJournal
Taking your own photos is then easy - just focus on the scene in the viewfinder of one of the cameras and then press the shutter button on both cameras at the same time. However, because you can only see the scene in one viewfinder, you need to make sure that both cameras are at the same height (so that the bar is not tilted) and that you don't get a nearby object (such as a tree branch) in front of the other camera that the other camera can't 'see'.
Photos
Photographs from disposable cameras should be developed where you bought it, we have good experience with developing in DM drugstores (9x13 photos for one crown, film for 59 CZK (approx. 2 USD)). And then all you have to do is scan the photos into your computer (you can also 'reshoot' them there with a digital camera - although it's a bit of a pain) and put them together in 3DJournal software.
While disposable cameras don't offer particularly amazing images (in particular, they tend to be less sharp than they should be), they are certainly sufficient for experimenting with 3D photos where objects are in motion. We wish you nice photos.
3DJournal, September 2003